
- Fri 01 November 2019
- education
- Xin Luigi Chen, Celine Liang
- #oer, #education, #jupyter, #textbooks, #engineering, #libretexts
Background
During the spring quarter and summer sessions, we focused on creating a Kubernetes bare-metal cluster to deploy JupyterHub, BinderHub, and other services.
Virtual Machine Cluster
During spring quarter, Kevin and Celine worked on creating the bare metal Kubernetes cluster. We first created a cluster of virtual machines (VMs) A Linux test server served as the master node and host machine, while virtual machines served as the child nodes. We used Vagrant to create these child nodes and Ansible to provision them.
This folder in our main repository contains instructions for setting up this development environment.
Bare-Metal Cluster
Our original bare-metal cluster consists of one master node named chick0 and 11 children named chick1 through chick10 sequentially. It also contains a management node called rooster, which acts as a DHCP server, a TFTP server for NetBoot and a proxy between the Internet and the Kubernetes cluster. The Kubernetes cluster is under a private network, so the only way to access the Kubernetes cluster is by connecting through rooster.
The following diagram describes our networking setup.
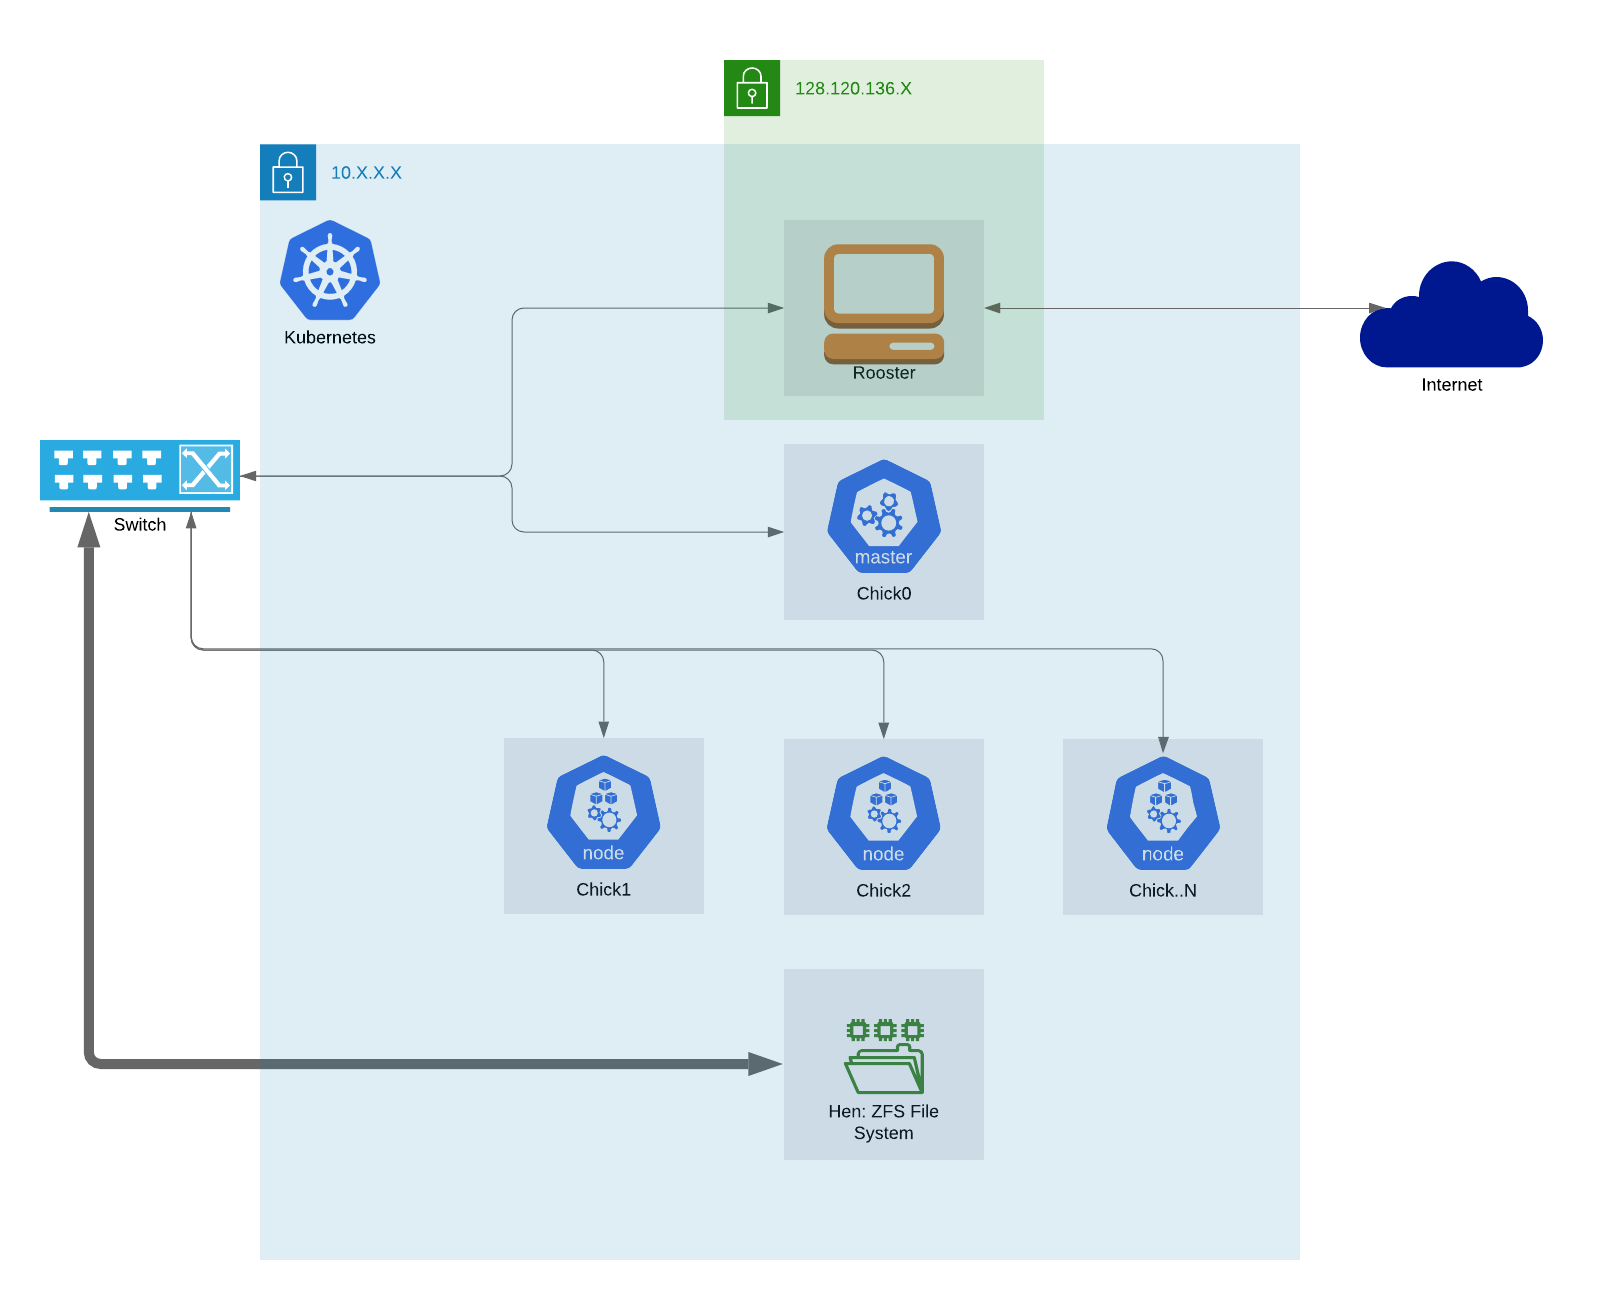
The private network is under the 10.0.0.0/8. Kubernetes uses this network for its resources to communicate. Rooster has a public IP address of 128.120.136.26, which serves multiple services based on the domain name entered by the user.
All servers are connected to a smart switch. The ZFS server is also connected to the switch and provides persistent storage of JupyterHub users' files.
PXEBoot used a preseed file and a DHCP server to install Ubuntu Server 18.04 on the servers more efficiently. Each new server pulls the preseed and installation files via a TFTP server set up on rooster.
As done in the development environment, the nodes were provisioned using Ansible scripts. Unlike the development environment, the bare-metal cluster uses Calico instead of Flannel for pod networking. This was chosen because Calico doesn't require software bridges or IP tunneling like Flannel does. When communicating from pod to pod, Flannel requires the pod's IP to be "packaged" in another IP (IP tunneling) to send to the other pod. Calico, on the other hand, uses BGP protocol and conserves the original pod IP.
When we first setup our bare-metal cluster, we used rooster for our storage needs by running a NFS server on it. Once we started getting ready for production, we decided that we needed a more robust and redundant option for our storage needs. With that in mind, we met with Mike and Dean, folks from the Bioinformatics Core at the Genome Center here at UC Davis, to discuss the best storage setup for our needs. After a couple of meetings, we came to the conclusion that a ZFS setup would make the most sense, this decision was reached mostly because of factors such as hardware already available and the experience on ZFS that Dean and Mike brought to the table.
Thanks to a retired ZFS server called the 'Hyperserver', we didn't have to spend time and money ordering parts for our design. The 'Hyperserver' was quite fitting of its name as it was a behemoth compared to the other nodes that we were used to working with. The 'Hyperserver' was a 4U rack with enough slots in the front to fit 24 drives, and 12 additional slots in the back for more. With the help of Mike and Dean, we updated the firmware on the motherboard, drives, and IPMI controller before we installed 24 storage drives in the front, and 2 RAID1 OS drives, 2 zil caches and 2 hot spares in the back. We used 4 stripes of 6 drives each with raidz2 for our data storage drives, the goal was to maximize speed and redundancy. With raidz2, each stripe could lose a maximum of 2 disks at once and the ZFS would still work. We then hooked up the ZFS to our smart-switch where the Kubernetes network lives. We made use of the 10Gib/s intel network card with a short range transceiver and 10M copper wire. After we finished setting the ZFS server up, we renamed it to 'hen' to go along with our naming theme for our cluster. Anyone can check out our extensive documentation for more information regarding how we setup our ZFS.
For security, we mainly followed the guide, How to Secure a Linux Server written by GitHub user iamthenachoman. Using the guide, we implemented SSHing into rooster using only an SSH public/private key pair, cleaned up short keys and UFW rules, and added intrusion detection for iptables, SSH, and rootkits. You could find more information on our security implementation in this section of our documentation.
Later, we added more chicks and upgraded the RAM of almost all chicks. We increased the number of worker nodes from 10 to 18, and upgraded the RAM on most chicks from 16GB to 64GB. These efforts prepared the cluster for handling new classes in the fall quarter.
Our documentation details our setup further and describes the actions taken to build the cluster from scratch.
Customizing JupyterHub
We made many modifications to JupyterHub, including redesigning the website, adding new default environments, and more.
JupyterHub pages is customizable using the Jinja2 templating system . There are two ways to add custom HTML files to JupyterHub (as described in this Discourse post):
- Through InitContainers that pull repositories of template files before the hub starts,
- Or through mounting ConfigMaps to the template file directory.
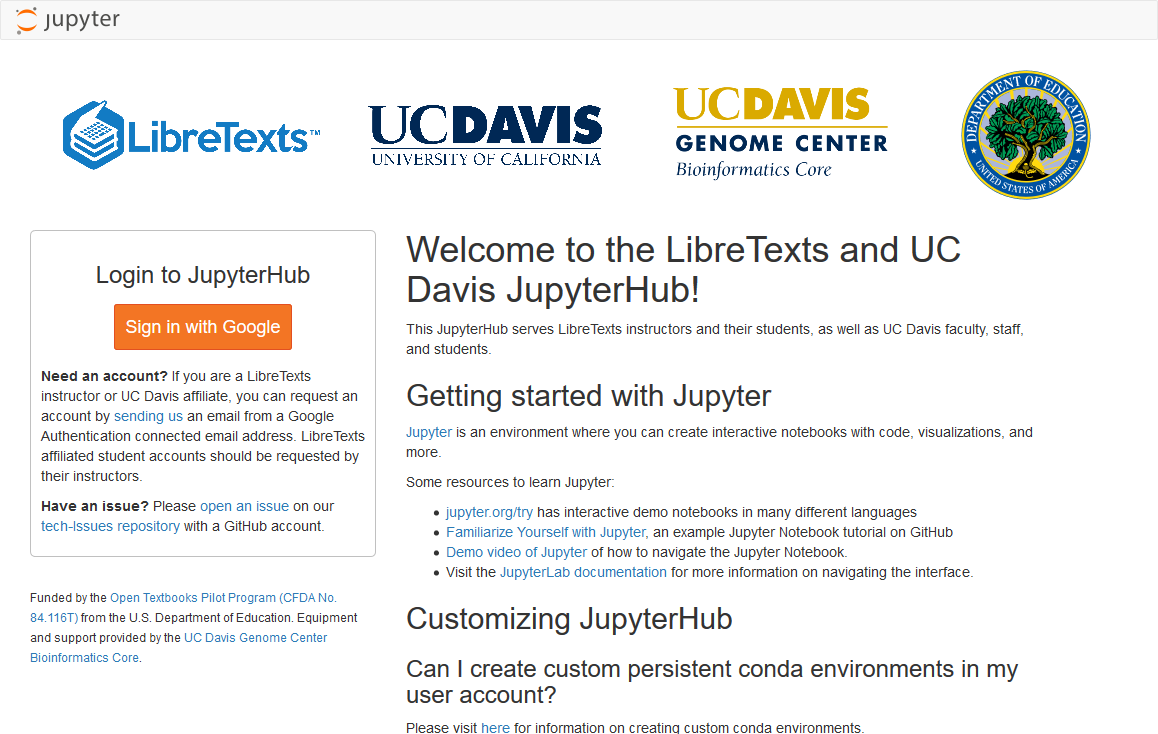
We chose the former option and have repositories for custom HTML files and additional images.
This is a screenshot of how the login page looks now.
Additionally, more spawner options are included. We modified the default environment to include many packages requested by professors and students. The Dockerfile for the default environment is maintained in this repository. The environment includes Python 2 and 3, Octave, R, Julia, and SageMath. The default environment mainly installs software and packages via apt and conda for security reasons.
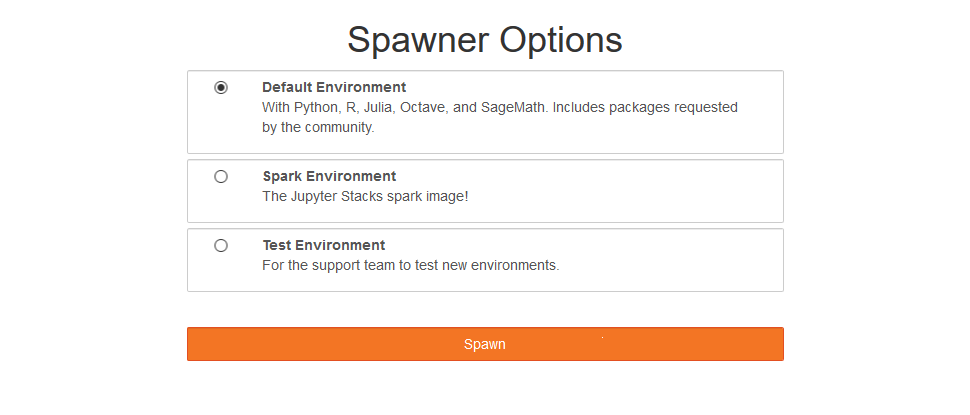
The default environment includes Python 2 and 3, Octave, R, Julia, and SageMath. Note that SageMath requires Python 2, so changing the Python path inside the SageMath configuration files is required. This article contains more information on how this was accomplished. This fix is automated in the Dockerfile.
RStudio is also offered alongside JupyterLab, since deploying web applications using packages such as shiny and shiny-dashboard require RStudio and do not run in Jupyter Notebooks.
Interesting Nuggets
- Our Nginx server serves as a proxy to direct packets from public ips to ips that metallb assigns to services on our cluster. When we setup HTTPS for JupyterHub, Nginx started complaing as it would try to decrypt the traffic meant for JupyterHub. We solved the problem by using the stream block, which streams packet to the backend without trying to decrypt anything.
- A service on the cluster can be connected to a ingress controller(for example Nginx) to make it accessible from outside the cluster. The ingress controller is not to be confused with the Nginx proxy that we have running outside the cluster, an ingress controller is a service running on Kubernetes that allows host or URL based HTTP routing from outside the cluster to services on the cluster.
- cert-manager is a very useful helm chart that can be deployed on Kubernetes to automatically manage and issue TLS certificates from various issuing sources. This alongside an ingress controller like Nginx can be a very useful setup.
- Grafana and Prometheus is a good solution for setting up basic monitoring and alerting on a Kubernetes cluster. They currently have a bug that erases all the saved data when the Grafana pod is deleted for some reason. A workaround is to save the json of the dashboards.
Future
In the future, we plan to create another cluster including, but not limited, to the following:
- Having multiple master nodes and using two HAproxy servers instead of a single Nginx server to avoid single points of failure.
- Assigning GPU's to different users.
- Assigning different networks based on organization.