
- Thu 18 April 2019
- research
- Bryn Cloud
- #ski, #sports, #engineering, #safety
Introduction
The goal of this work is to add a new page to the Ski Jump Design Tool that allows users to input a measured jump profile and get a depiction of the equivalent fall height (EFH) for their jump. Figure 1 illustrates the components of a terrain park using common terminology.
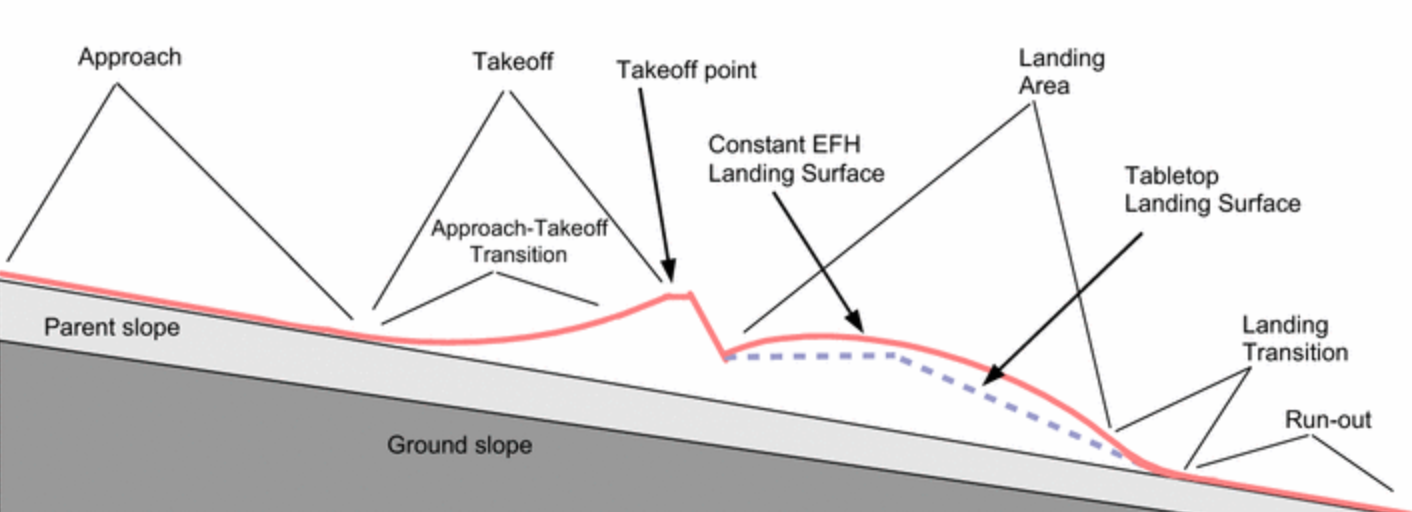
Figure 1. Components of standard terrain park jump from [Levy]_. Reprinted with the author's permission.
The software is designed for users with little to no technical background, and guides the users through correct implementation.
Calculating Equivalent Fall Height
The theory of equivalent fall height calculations has been discussed by [Levy]. EFH can be expressed as follows:
where \(v_j\) is the jumper's landing speed, \(\theta_J\) is the jumper's landing angle, \(\theta_L\) is the slope angle and \(g\) is gravity. This calculation was added to the skijumpdesign software to evaluate the EFH of any surface. A takeoff angle, skier instance, and a takeoff point relative to the surface are user inputs to the function. Then, the function uses these inputs to find the skier's impact velocity at each point along the surface and extracts the skier's landing speed and landing angle. The slope angle is calculated using the slope along the surface.
Measuring A Jump's Profile
A jump has been measured using the three following methods.
- Use a tape measure and level to find the surface distance and angle at defined points along the jump. Then, convert the values to planar Cartesian coordinate system that lies on the jumps cross section.
- Mount a high precision differential GPS to a snowboard and slowly walk the snowboard along the jump.
- Mount a differential GPS on a helmet and have a skier ski along the jump as slowly as possible.
We spent time this quarter testing the latter. A Piksi differential GPS system was used for the experiments. This system uses two receivers, the base and the rover, and calculates the relative position between the two. This referencing allows the differential GPS to have a one centimeter accuracy. The GNSS antenna was mounted to a bike helmet by drilling a hole through the top and fastening it down with a nut and bolt. The cable that connects the antenna to the rover evaluation board was fed down the profile of the helmet and into a backpack.
Preliminary tests were gathered using the helmet/backpack setup while a rider biked around a neighborhood in Davis. We found that while the rider was biking, there were a lot of obstructions that would make the rover and base station lose their fixed position when they were more than ~400 meters apart. This meant that we were still able to locate the rover, but it had a less accurate reading. We felt confident that we could maintain a fixed, accurate position for at least 350 meters, so we spent the next weekend testing the setup at Sierra at Tahoe ski resort.
The skier went down four different jumps while the recorder was with the base station left at the bottom of the resort. After the recorder started recording, the skier slowly rode up the takeoff of the jump. Once at the top of takeoff, the skier stopped and side stepped the takeoff lip. This method was used so that it is easier to take note of where the takeoff point of the jump is when we analyzed the data. After the sidestep, the skier stepped off the takeoff lip and slowly rode down the landing profile. We tested 2 jump lines, one approximately 200 meters from the base station, and one 1000 meters from the base station. We found that the differential GPS accurately measured at both locations, which was a pleasant surprise after the testing on a bike. This data shows promise for this jump profiling method. Figure 2 shows me (the skier) with the differential GPS ski helmet, and the backpack strapped to my chest.
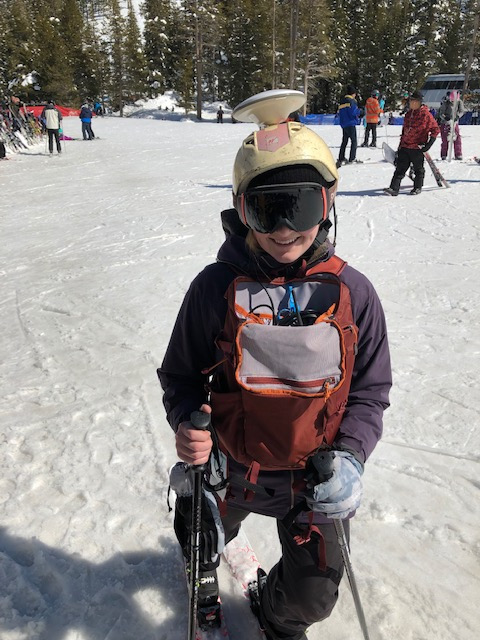
Figure 2. A differential GPS mounted to a helmet for testing at Sierra at Tahoe.
Ski Jump Application Update
The new version of the ski jump web application has launched and is available at https://skijumpdesign.onrender.com/. A home page was added to keep it user friendly. This is shown below.

Figure 3. New Ski Jump Web Application - Home Page.
The buttons centered in the middle of this page will direct users to the ski jump design or the new analysis page shown in Figure 4.
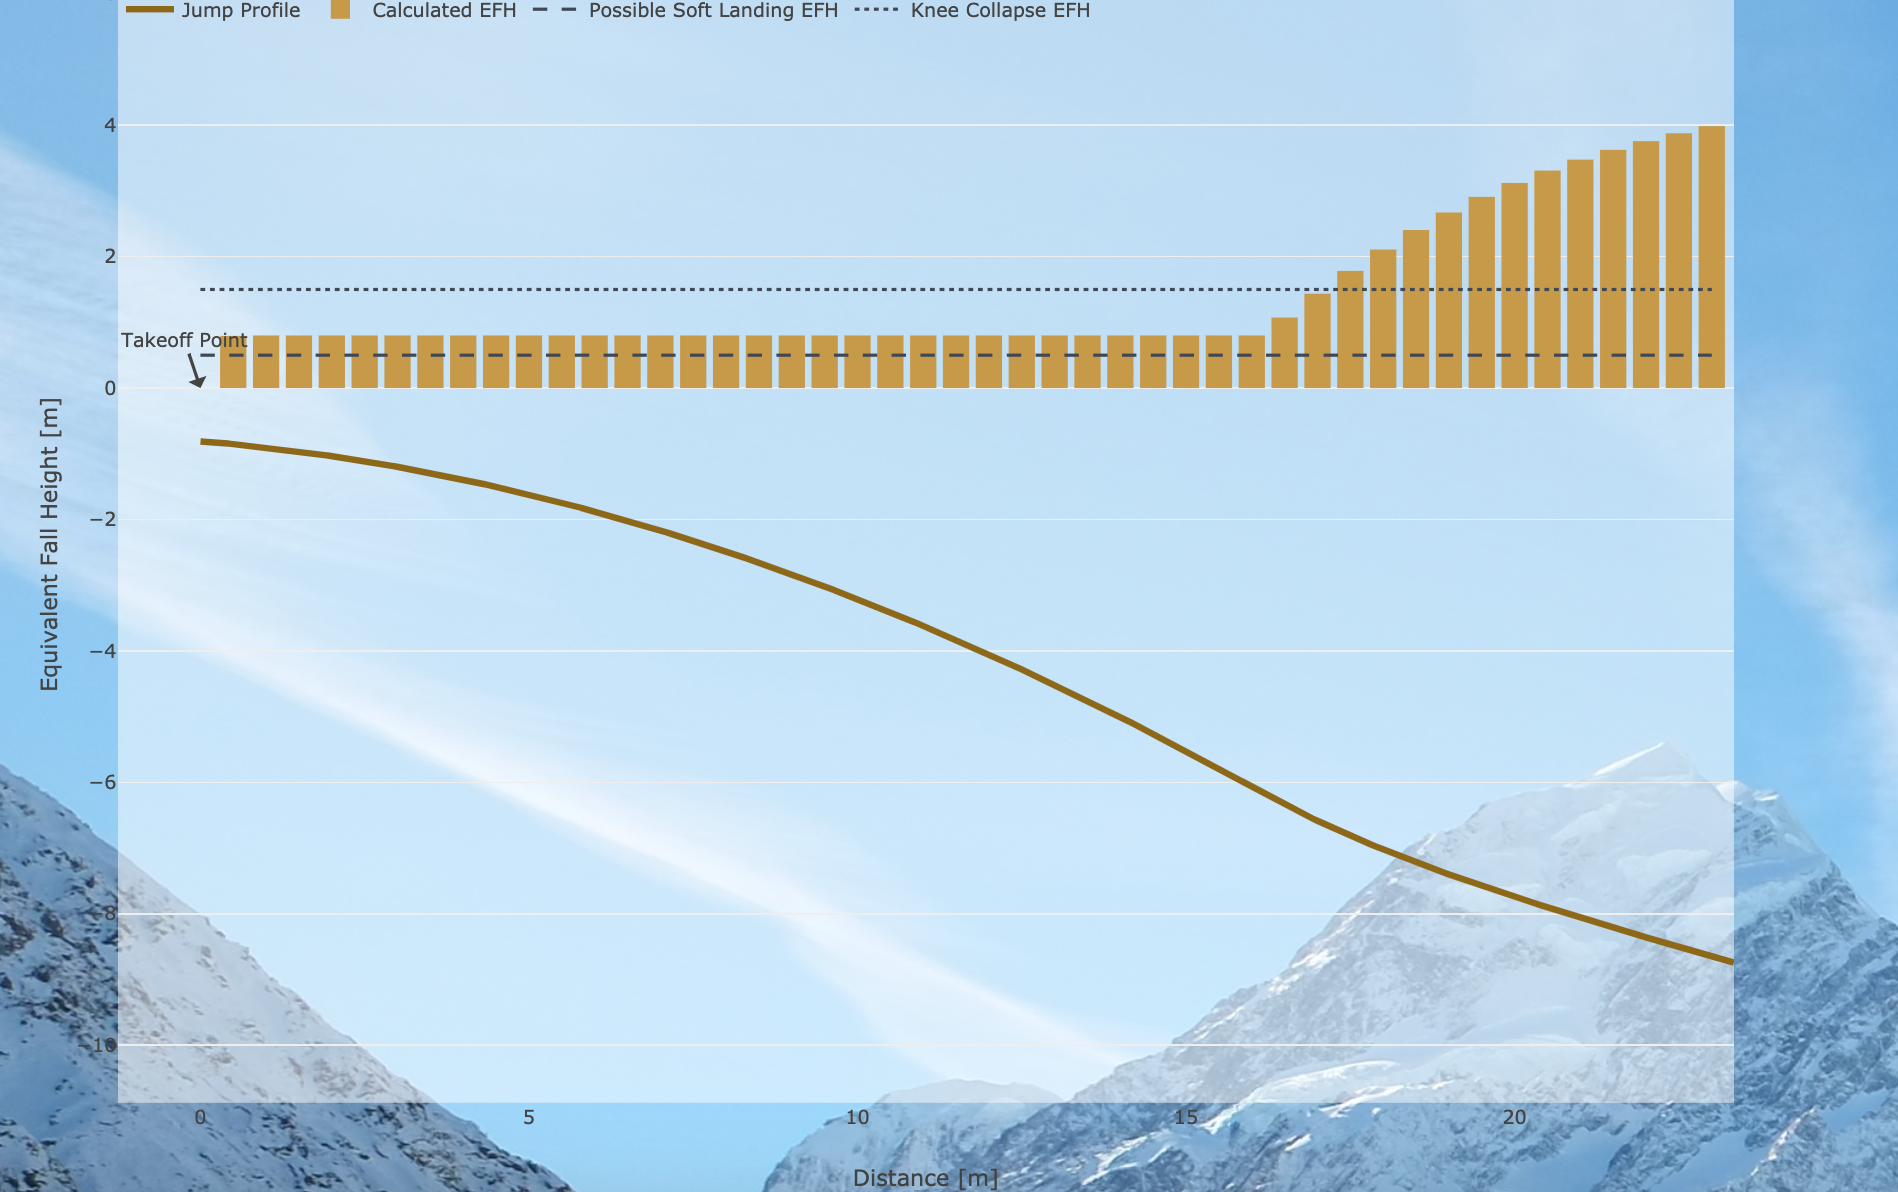
Figure 4. New Ski Jump Web Application - Analysis Page.
An example of a jump designed with a takeoff angle of 10 degrees and maximum equivalent fall height of 0.8 m is displayed when the page is loaded. The user can see the jump profile, EFH value, and knee collapse and possible soft landing EFH values. The calculation shows a constant EFH value of 0.8 m until it reaches the landing transition surface. Instead, the ski jump design app limits the acceleration felt by the skier - which is the reason for the spike in EFH. From there, the user can scroll down to the input box to upload their own jump. This input box is shown in Figure 5 with a sample csv file uploaded.
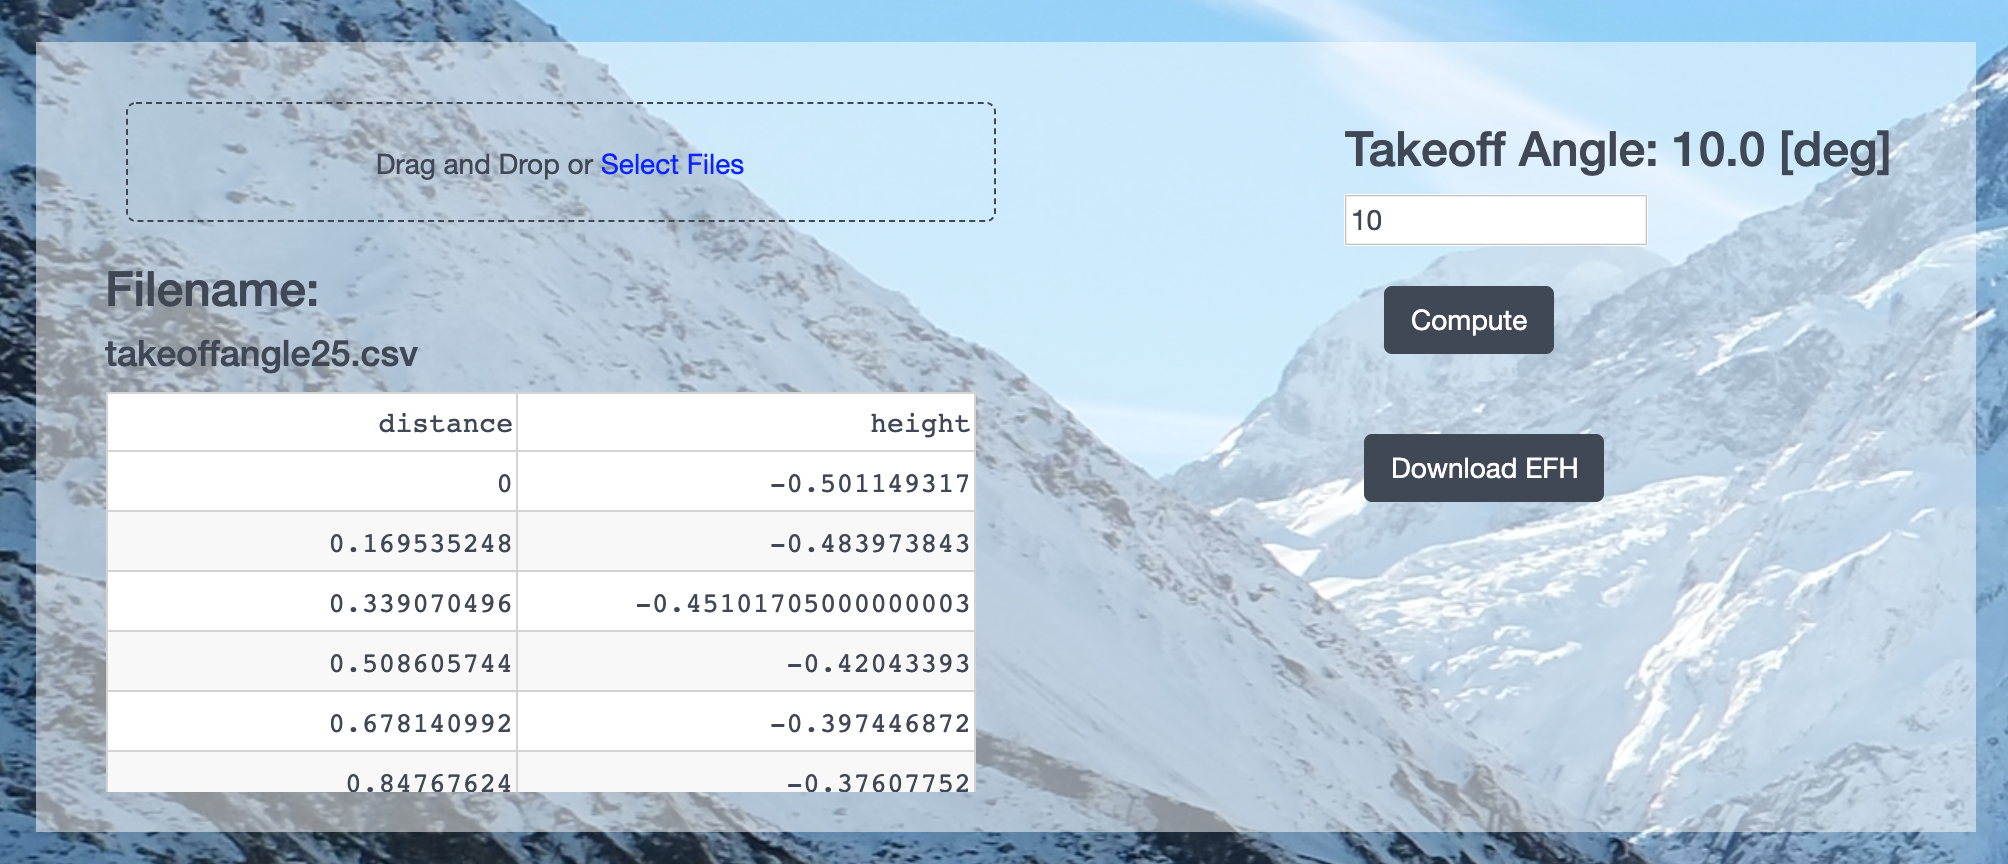
Figure 5. Analysis Page Input Box.
Conclusion
A function was added to the skijumpdesign software to calculate the equivalent fall height of a surface. A differential GPS mounted on a skier's helmet is a promising way to measure a jump profile because it is portable and efficient. The ski jump web application has expanded to showcase three pages: a home page, design page, and analysis page. Further work is needed to speed up the calculations, determine the best methods for users to measure a jump, and make the new web app user friendly.
Other related information:
- Web application: https://skijumpdesign.onrender.com/
- Software repository: https://gitlab.com/moorepants/skijumpdesign
- Software documentation: http://skijumpdesign.readthedocs.io
References
| [Levy] | Levy, D., Hubbard, M., McNeil, J.A. et al. Sports Eng (2015) 18: 227. https://doi.org/10.1007/s12283-015-0182-6 |